

A 20-year-old truck frame is a worst-case cleaning job in disguise. On the surface it looks like “just rust,” but lift the old paint and you usually find rust growing underneath, grease packed into the joints, weld spatter at every bracket, and pitting that has eaten into the steel itself. Sandblasting would strip it, but it also rounds edges, clogs the box sections with media, and buries the shop in dust. Chemicals work slowly and leave you with a disposal problem. A laser rust remover handles the same frame differently: it ablates the contamination layer by layer and leaves the steel underneath. This is a walkthrough of how that job actually goes, with the throughput built from our own measured rust and oxide rates rather than guessed from a brochure.
We should be clear up front about method. We did not have this exact 20-year frame on the bench. The figures below are scaled from our measured rates on comparable rust and mill scale, applied to a typical full-size ladder-frame surface area, so you can rerun the math for your own part. That transparency is the point — a number you can trace back to a test is worth more than a number you have to trust.
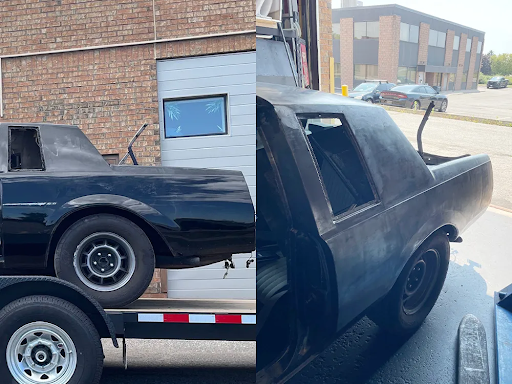
The first mistake people make is treating frame rust as one job. It is four or five jobs layered on the same part, and each one wants a different setting.
The dominant layer is rust under old paint. The factory primer and road paint survived in patches, and the rust crept in beneath them. You are not removing paint alone or rust alone; you are removing paint, then the rust beneath it, in the same pass or two, and the laser has to act on both without overheating the steel.
Then there is the geometry. A ladder frame is two long box-section rails joined by crossmembers, with brackets, rivets, and welds everywhere. Much of the surface is accessible from outside, but the inside faces of the box sections are not — and that matters for what the laser can and cannot reach.
Pitting is the quiet problem. After twenty years, rust has not just sat on the steel; it has etched into it. A laser will lift the rust out of a pit, but it will not fill the pit back in. The metal that corrosion ate away is gone. So “bare metal” on a pitted frame means clean bare metal with its original texture — not a freshly machined surface.
Two more layers show up specifically on trucks. Undercoating and spray-in bedliner are thick polymer films that were brushed or sprayed over the steel years ago, often right on top of early rust. They do not ablate like paint; they need their own energy and often a slower pass, because the film is thick and the rust beneath it has had a decade to bond. Plan these as a separate zone, not as an afterthought. And the fasteners — rivets, bolts, welded nuts — concentrate rust in tight shadows the beam reaches awkwardly, so they are usually the last zones cleaned and the ones most likely to need a second pass.
The real goal is narrower than people expect: get every accessible surface to bare, profiled steel that a coating or a weld repair will actually bond to, without thinning the section any further than the rust already has.
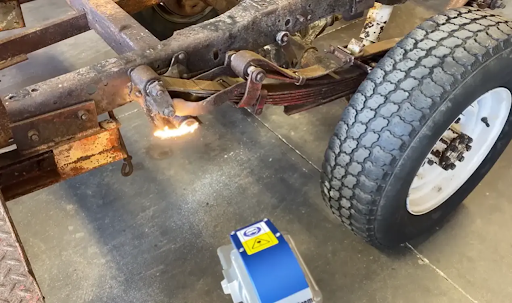
For a frame-sized job, we used a laser rust remover built around a JPT MOPA pulsed source. The MOPA architecture matters more than the brand on the casing, because it lets you control pulse width and frequency independently. That independence is what lets you separate “lift the contaminant” from “heat the steel” — the single most important control when you are working on pitted or thin material.
Power class for this job landed in the 500 to 1000 W laser cleaning machine range. A 100 to 200 W handles small parts and bench work, but a full frame is enough surface that the higher class earns its place in beam-on time. Air-cooled 1000 W units in this family weigh around 9 kg, which keeps the head portable for a handheld pass along the rails, and the power drift stays under 3% across a long job — useful when you are running the same setting for hours and need the last bracket to clean like the first.
The supporting gear is not optional. A scan head delivers the beam in a controlled pattern. Fume extraction sits at the source, because the ablated mix is not just iron oxide — it carries whatever was on the frame, including old paint and primer overspray. And because this is a Class 4 laser process, the work runs inside an enclosure with interlocks per ANSI Z136.1 and ISO 11553-1. None of that is decoration; it is what makes a long cleaning session safe to run on a floor.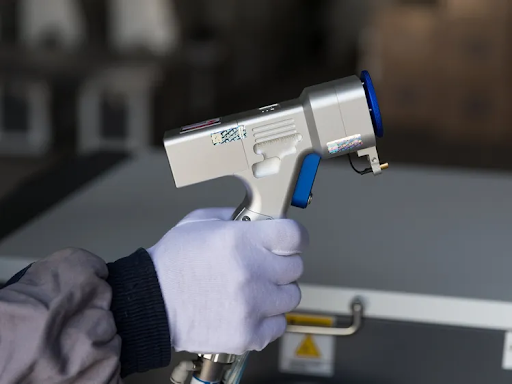
The job splits into six moves, and skipping the test patch is the one that gets people into trouble.
First, assessment. Walk the frame and tag the contamination types: light surface rust on the upper rails, dense scale and pitting in the low spots where water sat, paint overspray on the brackets, grease at the joints. Each zone gets its own parameter set later, so identifying them up front saves rework.
Second, the parameter set. Short pulses keep heat out of the steel. Frequency and scan speed are tuned per zone. Spot mode — the negative setting on a MOPA source, roughly -1 to -100 — sets how hard the beam hits the base metal: a gentler negative value for delicate or thin areas, a more aggressive one only where the scale is heavy and the base can take it. This is where the rust remover either protects the frame or chews it.
Third, the test patch. Pick a 100 by 100 mm area that represents the worst rust you have, run your setting, and inspect. You want bare metal, no heat tint, and no sign the base was removed. If the patch is clean, you have your recipe; if not, you adjust before committing the whole frame.
Fourth, zone cleaning. Light rust zones go fast. Dense scale and pitting take more passes. Paint-over-rust needs a two-stage touch: the paint absorbs the beam, then the rust beneath it, so you may need to slow down rather than crank power.
Fifth, verification. After each major zone, confirm no rust remains in the pits — that trapped rust is what bleeds through a new coating months later. A profile check or even a careful visual pass catches it.
Sixth, fume management throughout. The extraction runs from the first pulse to the last; you do not start it after the dust appears.
Working order is its own discipline. Clean top-down so debris does not fall onto an already-finished face, and work the long rails before the crossmembers so you are not reaching across fresh bare steel. On a frame this size you will usually run a handheld head along the rails and switch to a smaller focused spot or a manipulator arm for the brackets and inside corners. A gantry or robotic cell beats a handheld for repeatability if the same frame type comes through often, but for a one-off restoration the handheld gets it done without the capital. Either way, the test patch still sets the recipe; the delivery method only changes how fast you travel across the surface.
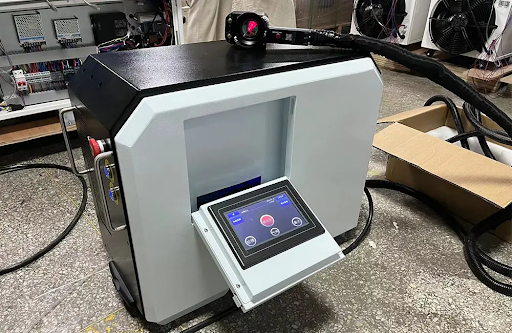
Settings are not a single dial you set once; they track the contamination. The levers are pulse width, frequency, scan speed, number of passes, and spot mode — the negative value on a MOPA source that controls how hard the beam strikes the base metal.
For light surface rust on the upper rails, start gentle: a more negative spot mode, a faster scan, one or two passes. The rust is loose, so you do not need to hit hard, and a gentle setting protects any thin or already-pitted steel.
For dense scale and pitting in the low spots, go the other way within safe limits: a less negative spot mode for more bite, a slower scan, and two to four passes. The scale is bonded, so it needs energy and time, but you still stop short of removing base metal — that is what the test patch proves before you commit.
For paint and primer overspray, remember the two-stage nature: the film absorbs first, then the rust beneath. A moderate setting with a slower scan usually clears both without over-cooking the steel.
For undercoating and bedliner, treat them as thick polymer, not rust: slower scan, more passes, and verify the rust underneath is actually gone rather than hidden under a half-cleared film.
The constant across every zone is short pulses. The moment you reach for long pulses to “go faster,” you trade selectivity for heat, and on a twenty-year frame that heat is the thing you were trying to avoid. Set short, prove on the patch, then scale across the frame.
The laser took off the rust, the mill scale, the paint and primer overspray, the grease, the weld spatter, and the loose scale sitting in the pits. What stayed was the steel itself — no measurable thinning beyond the pitting corrosion had already caused — plus the weld geometry and the shaped brackets, all undisturbed because the beam is non-contact.
One caution worth naming: shallow stamped marks, including part numbers and some VIN-adjacent stamps, can be erased if the setting runs too hot. On a restoration or identification-sensitive frame, keep the aggressive spot mode away from those areas and verify on the test patch. The laser is selective, but it does not know a part number from a rust spot unless you tell it by where you point.
What the laser could not reach is the honest limitation: the inside of sealed box sections. Without access holes, those faces stay as they are. For a frame headed to coating, that is usually acceptable because the enclosed surfaces are protected anyway; for a frame where interior corrosion matters, you plan access points or accept the limit up front rather than discover it after priming.
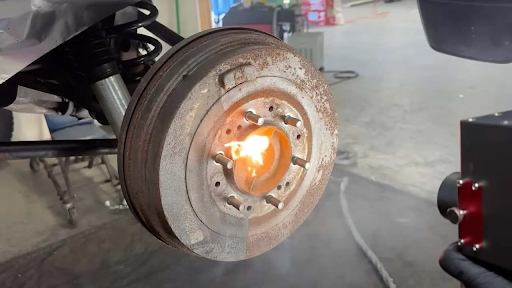
The outcome on the accessible surfaces was uniform bare steel with a profile the coating could grip. No rust remained where the beam could reach, no heat tint (mild steel tolerates pulsed cleaning easily, but we still check), and the fume was captured at source rather than filling the bay. The profiled, uncontaminated surface is what a coating actually bonds to, so the cleaning step pays back at the primer stage rather than failing as rust blooms through six months later. For frames headed to weld repair rather than coating, the same clean surface is what a sound weld needs — rust and scale under a bead are a classic cold-lap and porosity source, and the laser removes that risk at the root.
Against the alternatives, the trade is clear and honest. Sandblasting would have been faster on uniform heavy scale, but it rounds edges, drives media into every cavity, and creates a dust load the laser simply does not. Chemicals would have been slower still and added a disposal stream. The laser landed in the middle on speed, won on selectivity and cleanup, and left the frame dimensionally the same — which for a structural part is the whole point.
A laser rust remover is the right tool when the cleaning has to be selective, when edge or cavity sensitivity rules out blasting, when you have no appetite for media or chemical disposal, or when the job repeats and automates well. A frame restoration, a fleet maintenance cell, or a weld-repair prep line all fit that description.
It is the wrong call in three cases. If the rust is inside sealed sections you cannot open, blasting or a different access plan wins. If the part is cheap, non-critical, and covered in uniform heavy scale where a slightly rounded edge does not matter, a blast cabinet is often cheaper per hour. And if the goal includes filling pitting or rebuilding lost section, no surface-cleaning method does that — machining or welding handles the metal loss; laser only handles the contamination on top of it.
Match the method to the part, and a 20-year frame to bare metal stops being a mystery and becomes a sequence of zones, settings, and verified patches.
The post How Fiber Laser Ablation Cleaned a Truck Frame to Bare Metal appeared first on Gauge Magazine.