
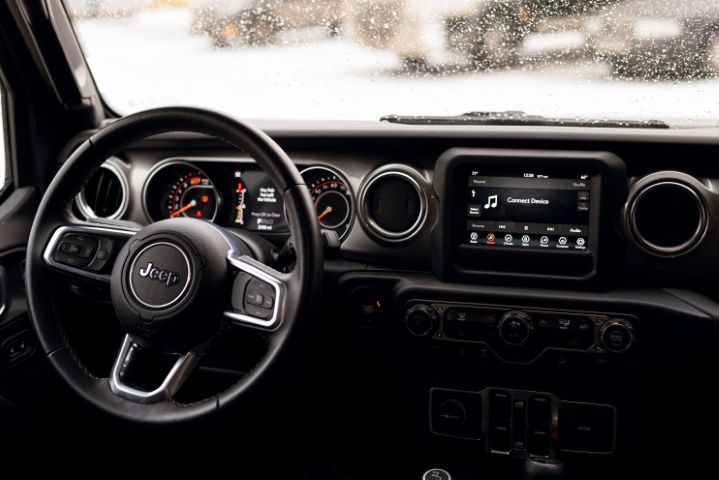
A successful Jeep audio upgrade starts before the dash comes apart. Identifying the exact factory radio, retained functions, security requirements, and signal path can prevent compatibility problems from undermining an otherwise impressive custom build after installation.
Custom Jeep audio builds often begin with bigger speakers, more capable amplification, better connectivity, or a full show-quality cabin. The factory radio already in the dash tends to receive less attention. Yet that unit can supply the audio signal while also interacting with steering wheel controls, camera displays, media ports, safety chimes, or vehicle settings. Knowing exactly what the radio does and what connects to it is often the difference between a build that comes together cleanly and one that turns into a series of adapters, lost functions, and repeat labor.
Every Jeep audio project should begin by identifying precisely what is already in the vehicle, not just the model name on the fender. The model year, trim, factory audio package, head unit part number, and connector arrangement can all affect the next step. It also matters whether the vehicle left the factory with an amplified or base sound system.
A Wrangler or Gladiator equipped with an available Alpine premium system uses a different amplifier and speaker configuration from a base system in the same generation, so the two require different integration planning. Grand Cherokee, Cherokee, Compass, and Renegade owners face the same basic question because equipment varies by year, trim, and options. A radio taken from another Jeep may look correct, but appearance alone does not establish electronic compatibility.
The official Mopar vehicle resource center provides access to model-specific owner’s manuals, radio guides, warranty information, and other factory resources. These documents can help confirm what the original system was designed to control.
Once the factory configuration is documented, the build has a meaningful choice to make. Some owners keep the original head unit and add amplification or a digital signal processor behind the scenes, preserving the factory look. Others replace it with an aftermarket unit chosen for connectivity, tuning options, or a larger display. A third approach uses another OEM radio, often a used unit, to retain factory-style trim while adding a feature that was not included in the original vehicle.
The right route depends on the purpose of the build. A show vehicle may prioritize a clean, factory-style dashboard and reversible changes. A sound-quality build may place greater value on signal control and tuning flexibility. Those priorities should be settled before the head unit, interfaces, or fabrication work are purchased.
A used OEM radio is not a universal component simply because it fills the same dash opening. Its part number, connectors, factory options, region where relevant, and security status all need checking. Some compatible used factory units may request an anti-theft code after installation, while other systems depend on electronic pairing or programming to the vehicle.
If a compatible unit requests a conventional security PIN, FindRadioCode provides a Jeep radio code lookup that uses radio serial information for the units supported by its service. Other retrieval methods or radio systems may require the vehicle’s VIN, radio serial number, proof of ownership, or programming by a qualified installer or dealership.
A security PIN cannot solve a hardware mismatch or activate a unit that requires vehicle-specific electronic pairing. Confirming the exact requirement before purchasing the radio—and before the dash is reassembled—can prevent an otherwise straightforward swap from stalling at the final step.
Depending on the model, year, trim, and factory equipment, the radio may interact with a factory amplifier, steering wheel audio controls, a backup camera, USB or media ports, antenna connections, safety chimes, or settings displayed through the infotainment screen. None of these functions should be assumed from the Jeep nameplate alone. The individual vehicle needs to be checked before anything is disconnected.
Each integration part has a different job. A dash kit handles physical fit and appearance. A vehicle-specific harness connects the replacement unit without unnecessary cutting, while a data interface may retain controls, factory amplification, camera functions, safety chimes, or vehicle settings where supported. Antenna and USB adapters address their own connections. Choosing those parts from model-specific documentation is safer than treating one adapter as a complete solution.
After compatibility and retained functions are settled, a serious custom audio build moves into signal planning. A factory output may already include equalization, crossover processing, volume-dependent changes, or level adjustments designed for the original speakers and amplifier. Feeding that signal into new equipment without understanding it can leave the system with missing frequencies, unbalanced response, noise, or limited tuning range.
A digital signal processor, commonly shortened to DSP, allows an installer to manage equalization, time alignment, crossover points, and output levels. It still needs the right input signal and must be planned alongside the head unit, amplifiers, speakers, and subwoofers.
Gauge Magazine’s guide to premium car audio upgrades makes a related point: component quality matters, but correct matching and installation determine how well the complete system performs. The Gauge Magazine AXXESS AX-DSP review also provides a practical example of using a DSP and vehicle-specific harness behind a factory radio.
A clean custom Jeep audio build should remain serviceable after the trim panels go back on. Recording part numbers, labeling wiring runs, and keeping the factory radio and original connectors can save time if the system later needs diagnosis or another upgrade. Where a suitable harness or interface is available, using it is usually preferable to cutting a factory loom that a future owner or installer will have to reconstruct.
Service access also matters in show vehicles. An amp rack can look finished without becoming impossible to remove, and hidden wiring can still be organized and documented. Those details may not be visible during a walk-around, but they often reveal whether the installation was planned as carefully as the parts on display.
Anyone planning a show-level system can also look through the Slamology 2026 Audio coverage for examples of custom audio builds, competition systems, equipment layouts, and installation ideas.
The strongest custom Jeep audio builds solve factory compatibility and integration before fabrication and power-hungry components take over the project. Getting the electronics right first allows the finished system to look intentional, retain the functions that matter, and perform as one coherent installation.
The post Custom Jeep Audio Builds: Factory Radio Details Owners Should Check Before Upgrading appeared first on Gauge Magazine.