

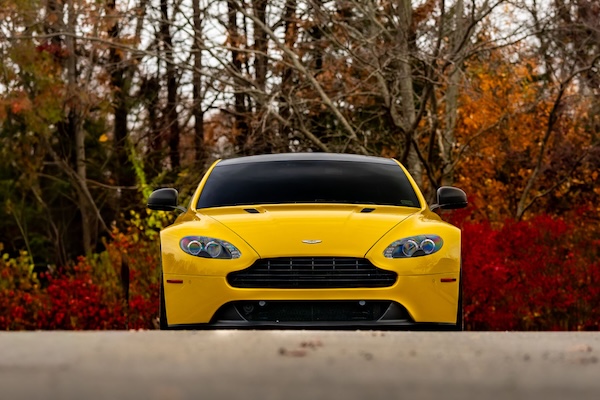
It’s easy to make a car look different on camera. The right light can define the body shape, and a well-composed shot can transform a simple parking lot into a part of the story.
It is especially important for car blogs because images grab people’s attention immediately and define whether they will read your post or keep scrolling. In this guide, we explain how to take good car photos. You will develop a thoughtful yet simple approach that will help you create ineffable photos that will boost your online success.
Understanding how to take pictures of your car begins with choosing a setting that will emphasize your vehicle without overpowering it. Observe the scene and see what will be in the frame behind your subject. An empty road, a busy car park, an industrial wall, or a landscape view can add some context. Poles, signs, and other parked cars can detract from it.
What is the purpose of your blog post? For a road-trip tale, a natural setting with the car prepped for the adventure may be perfect. For an in-depth test drive, a less distracting environment may be better.
Before delving into car photography tricks, get your automobile ready for the shoot. Wash the outside and make sure windows, mirrors, and wheels are clean. If you’re going to shoot the car interior to make your story more dynamic, be sure to clear away mess and personal items for a neat, organized appearance.
Car photography tips call for the golden hour glow of early mornings and late afternoons. The light is even, and there’s soft shadowing to bring out your bodywork. Make the most of clouds – if you’ve got a shiny vehicle on a bright sunny day, you’ll get a lot of glare. Car paint and windows can reflect everything around them, including trees, buildings, and the photographer. Change your position, and if it does not help, remove unwanted reflections when you edit car photos (see Step 7).
Once the car and scene are set up, spend some time before the shoot to set up your camera. If the car is static, test at about 1/250 sec shutter speed, f/5.6-f/8 aperture, and the lowest ISO (100-400) in bright daylight.
Cars that move require you to use a much faster shutter speed than for static images. Try 1/500 if the car is traveling at medium speed or faster, and use 1/1000 or higher for images. If your camera allows, also set the exposure to continuous autofocus and shutter burst mode, and slightly increase the ISO to keep the picture sharp. Don’t push too far or the picture will look grainy.
Move around your car and note how its shape changes as you adjust its angle. If you want to accentuate the shape you’ve drawn, try taking a head-on shot of the front or rear. The 3/4 angle adds dynamism.
Experiment with the camera height. Shoot from just below your waist to give the car some extra presence, without overplaying the perspective. Eye-level shots tend to look more realistic when reviewing and writing detailed blog posts.
Understanding how to photograph cars comes down to thoughtful compositional decisions. Leave your main subject some breathing room within the frame. If the car is facing left, for example, leave a little more space in front of it.
Vary your compositions throughout the blog post. Combine wider images that establish the setting with tighter shots that focus on specific features.
Small adjustments can make your blog consistent and polished without compromising its believability. Upload your pictures to the car photo editor and correct the exposure. Then, tweak the contrast to ensure no important details are obscured or washed out.
Crop your images for a stronger composition. Remove empty areas that do not contribute to the image, but leave enough space around the vehicle to preserve its shape and direction. Straighten the horizons and vertical lines if they look uneven. Remove minor distractions or refine elements that pull attention away from the vehicle.
Finally, look at the whole set together. Similar brightness, color, and contrast will make the photos feel like part of one story. Export them at a sensible size and quality for your blog so pages load efficiently.
Great car photos come from thoughtful choices, not complicated equipment. With practice, you can turn a boring, inconsistent set of images into a compelling visual narrative that will fascinate your audience. Grab your camera, put these techniques into practice, and be ready for a million views and likes on your car posts!