
Adding power is only part of building a dependable performance car. More boost, harder braking, tighter engine-bay packaging and additional electrical equipment can all change how heat moves through a vehicle. A modification that performs well under light use may behave differently after repeated braking, a hard pull or extended driving.
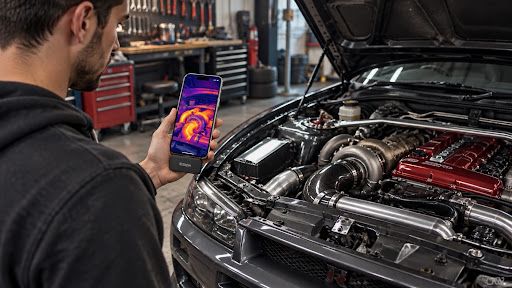
Thermal imaging gives builders another way to see what is happening. A thermal camera cannot determine by itself whether a component is mechanically sound or a modification is safe, but it can reveal temperature patterns that deserve a closer look. Used before and after a modification, it can also help show whether heat was reduced, redistributed or simply moved somewhere else.
The key is consistency. Thermal images become much more useful when the vehicle is tested under similar conditions and the same components are viewed from approximately the same distance and angle.
Performance driving converts a tremendous amount of the vehicle’s kinetic energy into heat through the braking system. That makes the brakes an obvious place to use thermal imaging.
After driving a repeatable route or performing a controlled test, compare similar areas of the braking system from side to side. Instead of focusing exclusively on the highest temperature displayed by the camera, look for patterns and differences that consistently return during repeated testing.
A significant difference between comparable components may justify a closer inspection of pad contact, caliper operation, rotor condition, brake cooling or another part of the setup. It does not prove which component is responsible.
Gauge Magazine’s guide to performance brake pads and brake materials explains why different brake components respond differently as temperatures and driving demands increase.
Avoid using a universal brake-temperature number found online as a pass-or-fail standard for every vehicle. Vehicle weight, brake design, pad compound, rotor size, speed, ambient conditions and the test itself can all affect temperature.
And never touch a rotor, caliper or nearby brake component to determine whether it is hot. Components can remain hot enough to cause serious burns after the vehicle has stopped.
An upgraded radiator, fan, shroud, duct or intercooler may look impressive without necessarily producing the airflow or heat transfer expected under actual driving conditions.
A useful approach is to establish a baseline before making the modification. Bring the vehicle to a repeatable operating condition, capture the thermal pattern and record the relevant conditions. After the modification, repeat the test as closely as practical.
Temperature differences across a radiator or intercooler can provide clues about how heat is being distributed, but a thermal image should not be treated as a complete diagnosis of coolant or charge-air flow.
Gauge Magazine has featured plenty of modified cars where cooling becomes increasingly important as power increases. This modified 2017 Honda Civic Type R, for example, combines an upgraded turbo with aftermarket intercooler components and other supporting modifications.
If a thermal pattern suggests a cooling problem, confirm it with the appropriate diagnostic information. Coolant temperature data, pressure testing, datalogs and manufacturer-recommended diagnostic procedures can provide information that an infrared image alone cannot.
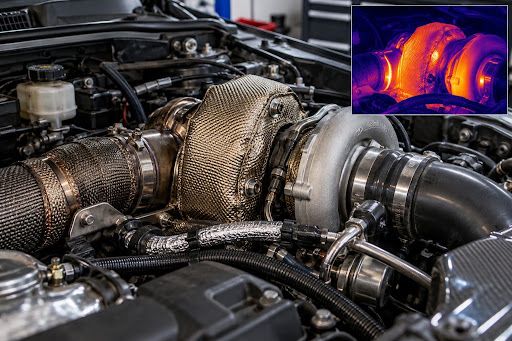
Turbochargers, exhaust manifolds, downpipes and catalytic converters can create substantial underhood heat. In a modified engine bay, that heat may be closer to wiring, hoses, intake plumbing, fluid lines or body components than it was in the factory configuration.
A thermal scan after driving can help identify where that heat is concentrated and which surrounding components are being exposed to it.
This is especially useful when evaluating heat shields, thermal barriers or revised component placement. Capture a baseline, make the modification and then repeat the test under similar conditions. The comparison can show whether the heat pattern around nearby components changed.
Thermal imaging can also help a builder think beyond peak horsepower. Gauge Magazine’s guide to diesel performance upgrades discusses how turbocharger and intercooler modifications work together as part of a larger performance system.
Maintain a safe distance while inspecting exhaust components. Turbochargers and exhaust parts can remain dangerously hot well after the engine has been shut down.
The thermal story does not necessarily end when the ignition is switched off. Once the vehicle stops moving, airflow through the engine compartment decreases while the engine, turbocharger, exhaust and other hot components continue releasing stored heat.
This can create heat soak around nearby components such as the intake system, battery, wiring, sensors, fluid reservoirs and hoses.
Instead of taking only one image immediately after shutdown, capture the same area at consistent intervals. For example, a builder might photograph the area immediately after stopping and then repeat the image several times during the cooldown period.
The resulting sequence can be more useful than a single maximum-temperature reading because it shows where heat remains concentrated and how quickly different areas cool.
Modified vehicles frequently add electrical loads that were not part of the original configuration. High-output audio systems, auxiliary lighting, electric fans, fuel pumps, air-suspension compressors and other accessories can add wiring, connections, relays, fuses and distribution points throughout the vehicle.
Under normal operating load, thermal imaging can help compare accessible electrical connections. If one comparable connection repeatedly appears significantly warmer than the others, it may deserve further inspection.
The thermal image does not identify the cause. A warm connection could require checking terminal tightness, corrosion, conductor condition, wire sizing or other parts of the circuit using proper electrical diagnostic procedures.
This can be especially useful on heavily modified vehicles. Gauge Magazine’s feature on the Droppin Hz 1990 Chevrolet Astro audio build shows how extensive aftermarket systems can incorporate multiple amplifiers, batteries, alternators and custom wiring into a single vehicle.
One of the most important limitations of thermal imaging is that different surfaces do not radiate infrared energy equally. Highly reflective materials, particularly polished metals, can reflect infrared energy from surrounding objects and make the apparent temperature misleading.
FLIR’s guide to emissivity and thermal imaging explains that polished metallic surfaces can have very low emissivity and may reflect surrounding thermal energy rather than provide an accurate indication of their actual surface temperature.
That matters in an engine bay filled with aluminum tubing, polished fittings, metal brackets and other reflective components. Changing the camera angle can help identify an obvious reflection, but accurate temperature measurement may require proper emissivity settings and measurement techniques.
One of the most valuable uses of thermal imaging is also one of the least dramatic: creating a repeatable before-and-after record.
Record the route or test procedure, approximate ambient temperature, driving time, operating conditions, camera position and relevant camera settings. When possible, capture the same component from the same position each time.
A phone-connected tool such as the Rision Thermal camera for Smartphone can make it convenient to capture thermal images while documenting a build. Rision describes its Magic camera as using single-lens AI dual-light fusion to combine thermal information with visible detail, which can make it easier to identify the component or area represented in the thermal image.
The record helps answer an important question after a modification: did the change actually improve the heat problem?
For example, if a builder installs a turbo heat shield, changes intercooler ducting or relocates an electrical component, a comparable before-and-after test can show whether the surrounding thermal pattern changed.
Change several components simultaneously and that comparison becomes much less useful because it is difficult to determine which modification produced the result. When practical, make one meaningful change, repeat the test and compare it with the baseline.
Thermal imaging is most useful when it complements the other tools already used to evaluate a modified car. It does not replace coolant-temperature sensors, pressure testing, multimeters, voltage-drop testing, datalogs or mechanical inspection.
It also measures surface temperature rather than looking through a component to reveal its internal condition. Camera settings, viewing angle, distance, surface material and reflected infrared energy can all influence the reading.
Its advantage is visualization. A thermal camera can quickly show that one brake assembly is behaving differently from another, that heat is lingering near a wiring harness after shutdown or that an exhaust modification changed the thermal environment around neighboring components.
For a modified car, that information can help turn heat management from guesswork into a repeatable testing process. Establish a baseline, change the vehicle, repeat the same test and then confirm anything suspicious with the appropriate mechanical or electrical diagnostic method.
The goal is not simply to find the hottest object in the engine bay. It is to understand where heat goes—and whether the modifications made to control it actually worked.
The post Six Ways Thermal Imaging Can Improve Heat Management in a Modified Car appeared first on Gauge Magazine.